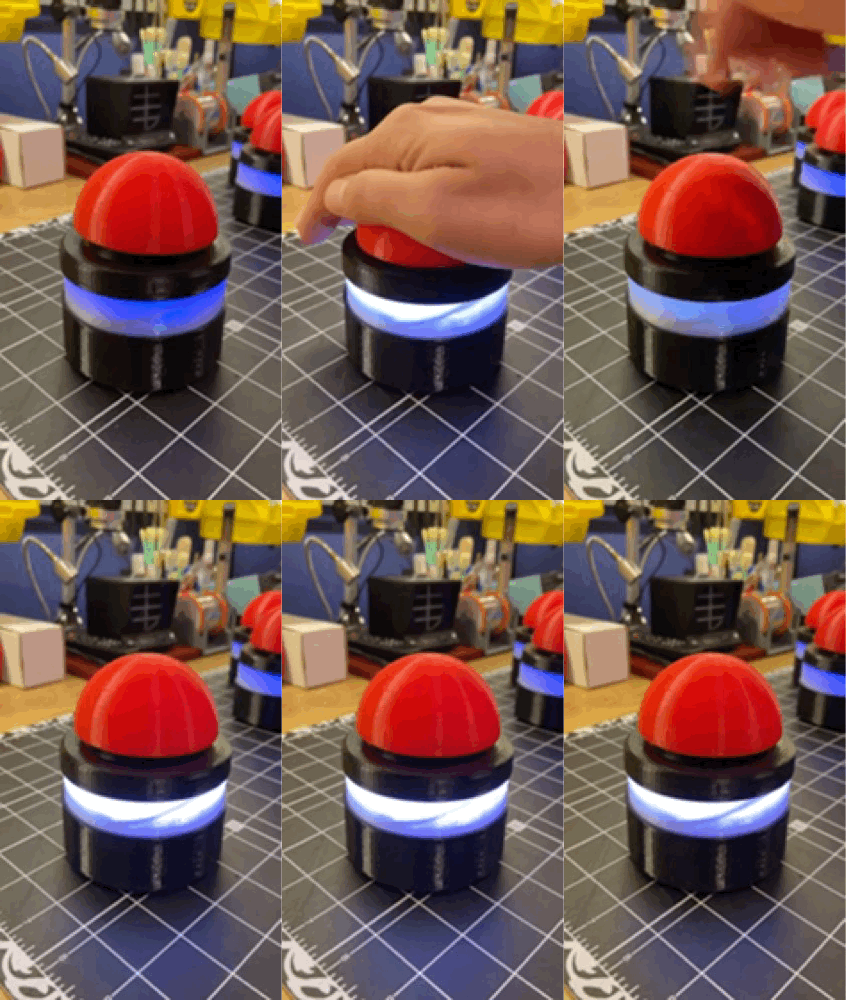
tl;dr: I made 3D printed, bluetooth game show buzzers for playing The Voice at home, powered by Adafruit Circuit Playground Bluefruit boards and a laptop.
Bringing Reality TV to Reality
If you ask me, combining a makeshift karaoke setup, cheap beer, and good friends all but guarantees a fun night. Ok who am I kidding, my college days are well behind me – decent beer. Anyway, toss in some random swivel chairs and before you know it, you’re playing your own version of The Voice™ wishing you had some big red buttons to smash. That’s the origin story of this project in a nutshell.
For those of you who aren’t consumers of upper echelon entertainment, The Voice is a singing competition show. At the beginning of each season, each contestant performs a “blind” audition to a panel of “coaches”, hoping that at least one of the coaches thinks they got what it takes to crush the rest vocally. The coaches initially sit with their backs to the singer, presumably to ensure that they’re judging with their ears and not their eyes. If at any point during the audition a coach likes what they hear and wants the singer to join their team, they can hit a big red button attached to their chair. Doing so spins the coach’s chair around to face the stage while blasting out an iconic “boom” that lets everyone know they mean business. After finishing the song, the contestant decides which coach (from the ones that turned around, if any) they want to help train them for vocal combat. After numerous rounds of sing-off battles, buzzer smashing, and chair spinning, the last singer standing scores a pile of cash and record deal. Or at least that’s what I remember from the two times I saw the show a few years ago. Our homebrew version was a little simpler, but the same gist. Here it is in action:
Snakes With Teeth
At the heart of the system is a laptop that communicates with all of the buzzers over Bluetooth Low Energy (BLE). Everything on the laptop side is handled by a python script. Its first order of business it to wait for all of the buzzers to connect. Once that’s done, it’s game on and the laptop eagerly waits for someone to buzz in. Every time someone buzzes in, the laptop plays the BOOM and informs the the buzzer what order it just buzzed in at, so that it can update its lights accordingly. First place pulses fastest, last place pulses slowest. If any of the buzzers is held for at least five seconds, the buzzer will send a message to the laptop that will tell all of the buzzers to reset themselves for the next round.

Inside each buzzer device is an Adafruit Circuit Playground Bluefruit board. This neat little circuit board is powered by a LiPo battery, and includes a ring of Neopixels, a BLE radio, and a ton of other sensors and gizmos that aren’t needed for this project. The Bluefruit board runs CircuitPython which makes coding it up pretty smooth. Arduino is also an option, if that’s your thing. For me, being able to use the REPL and asyncio made python a no brainer for this simple project. Head over to to GitHub for the nitty gritty coding bits.
Buzzer Guts
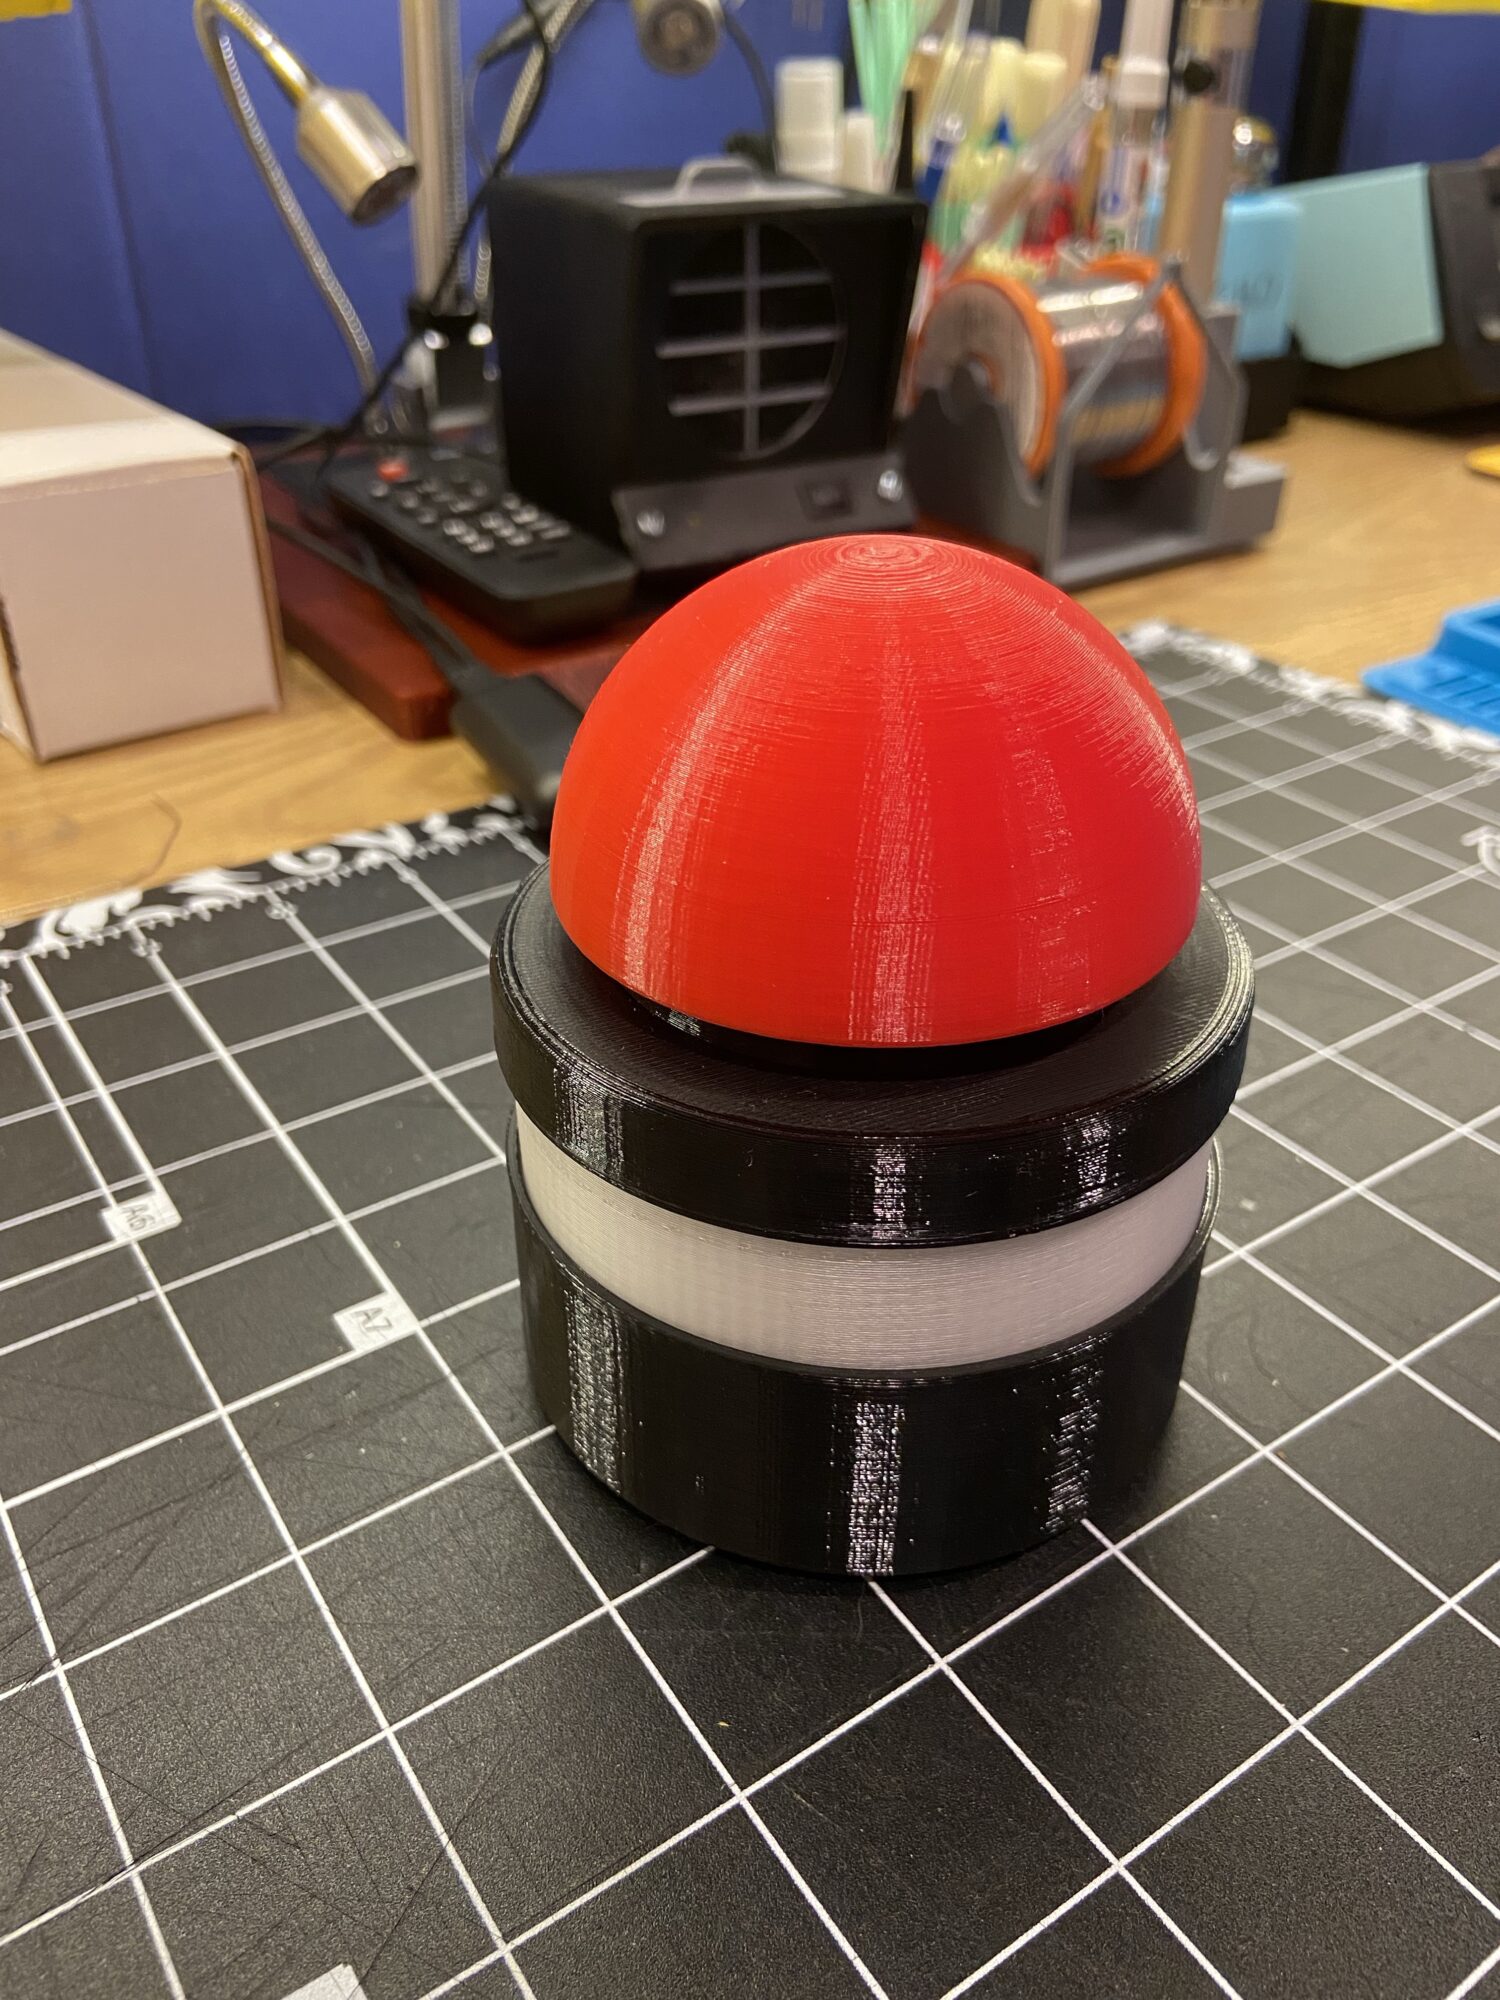

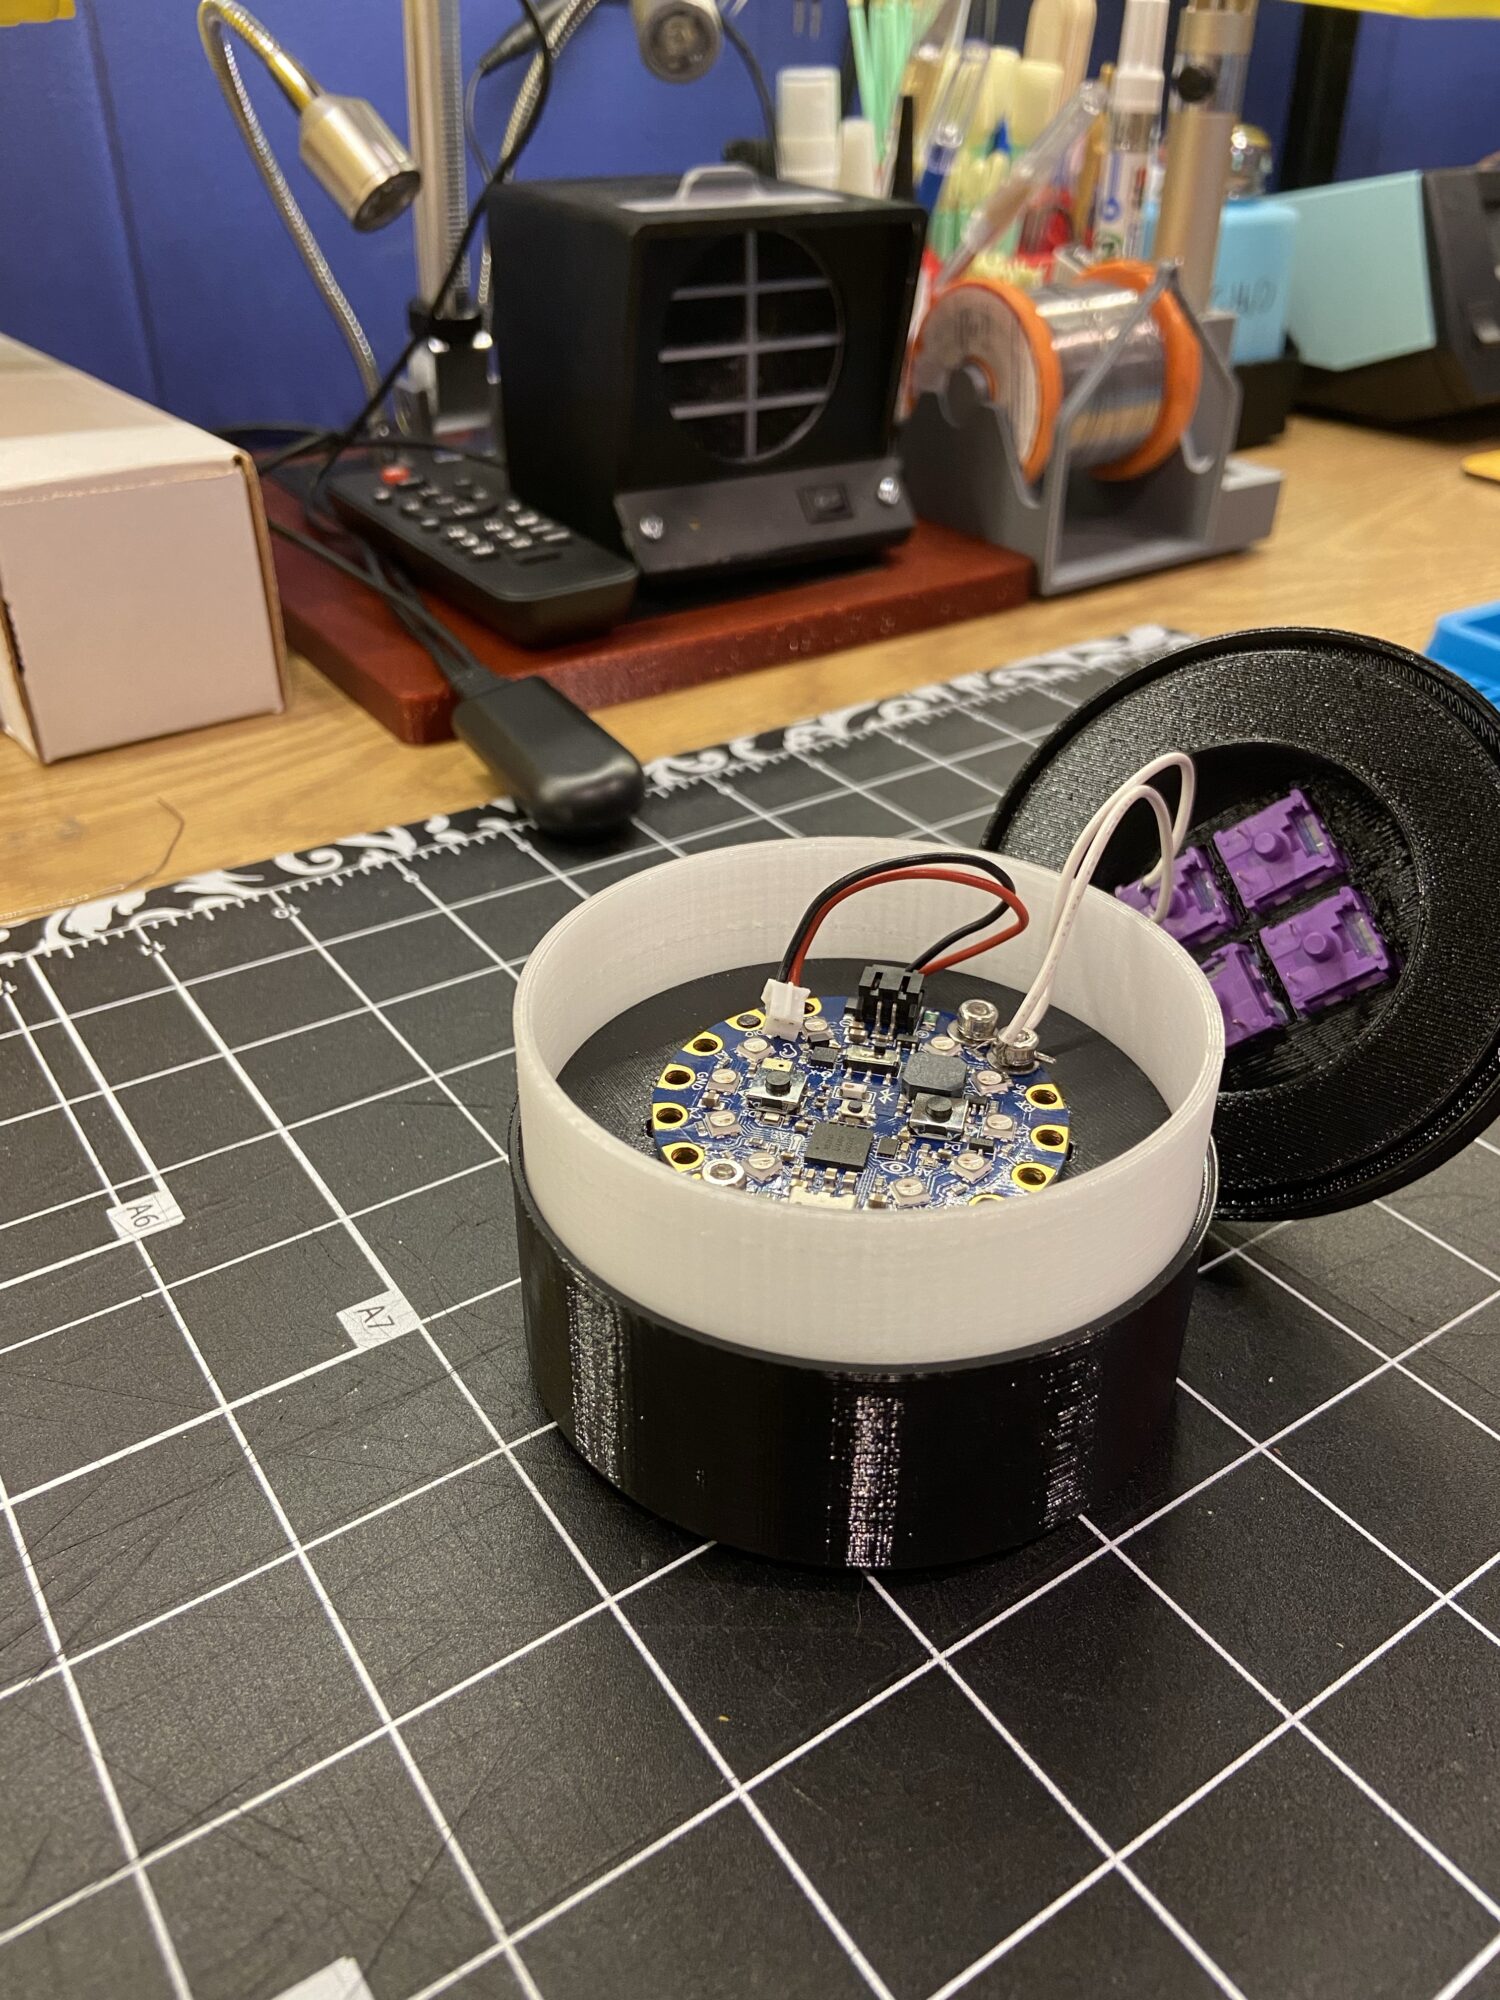


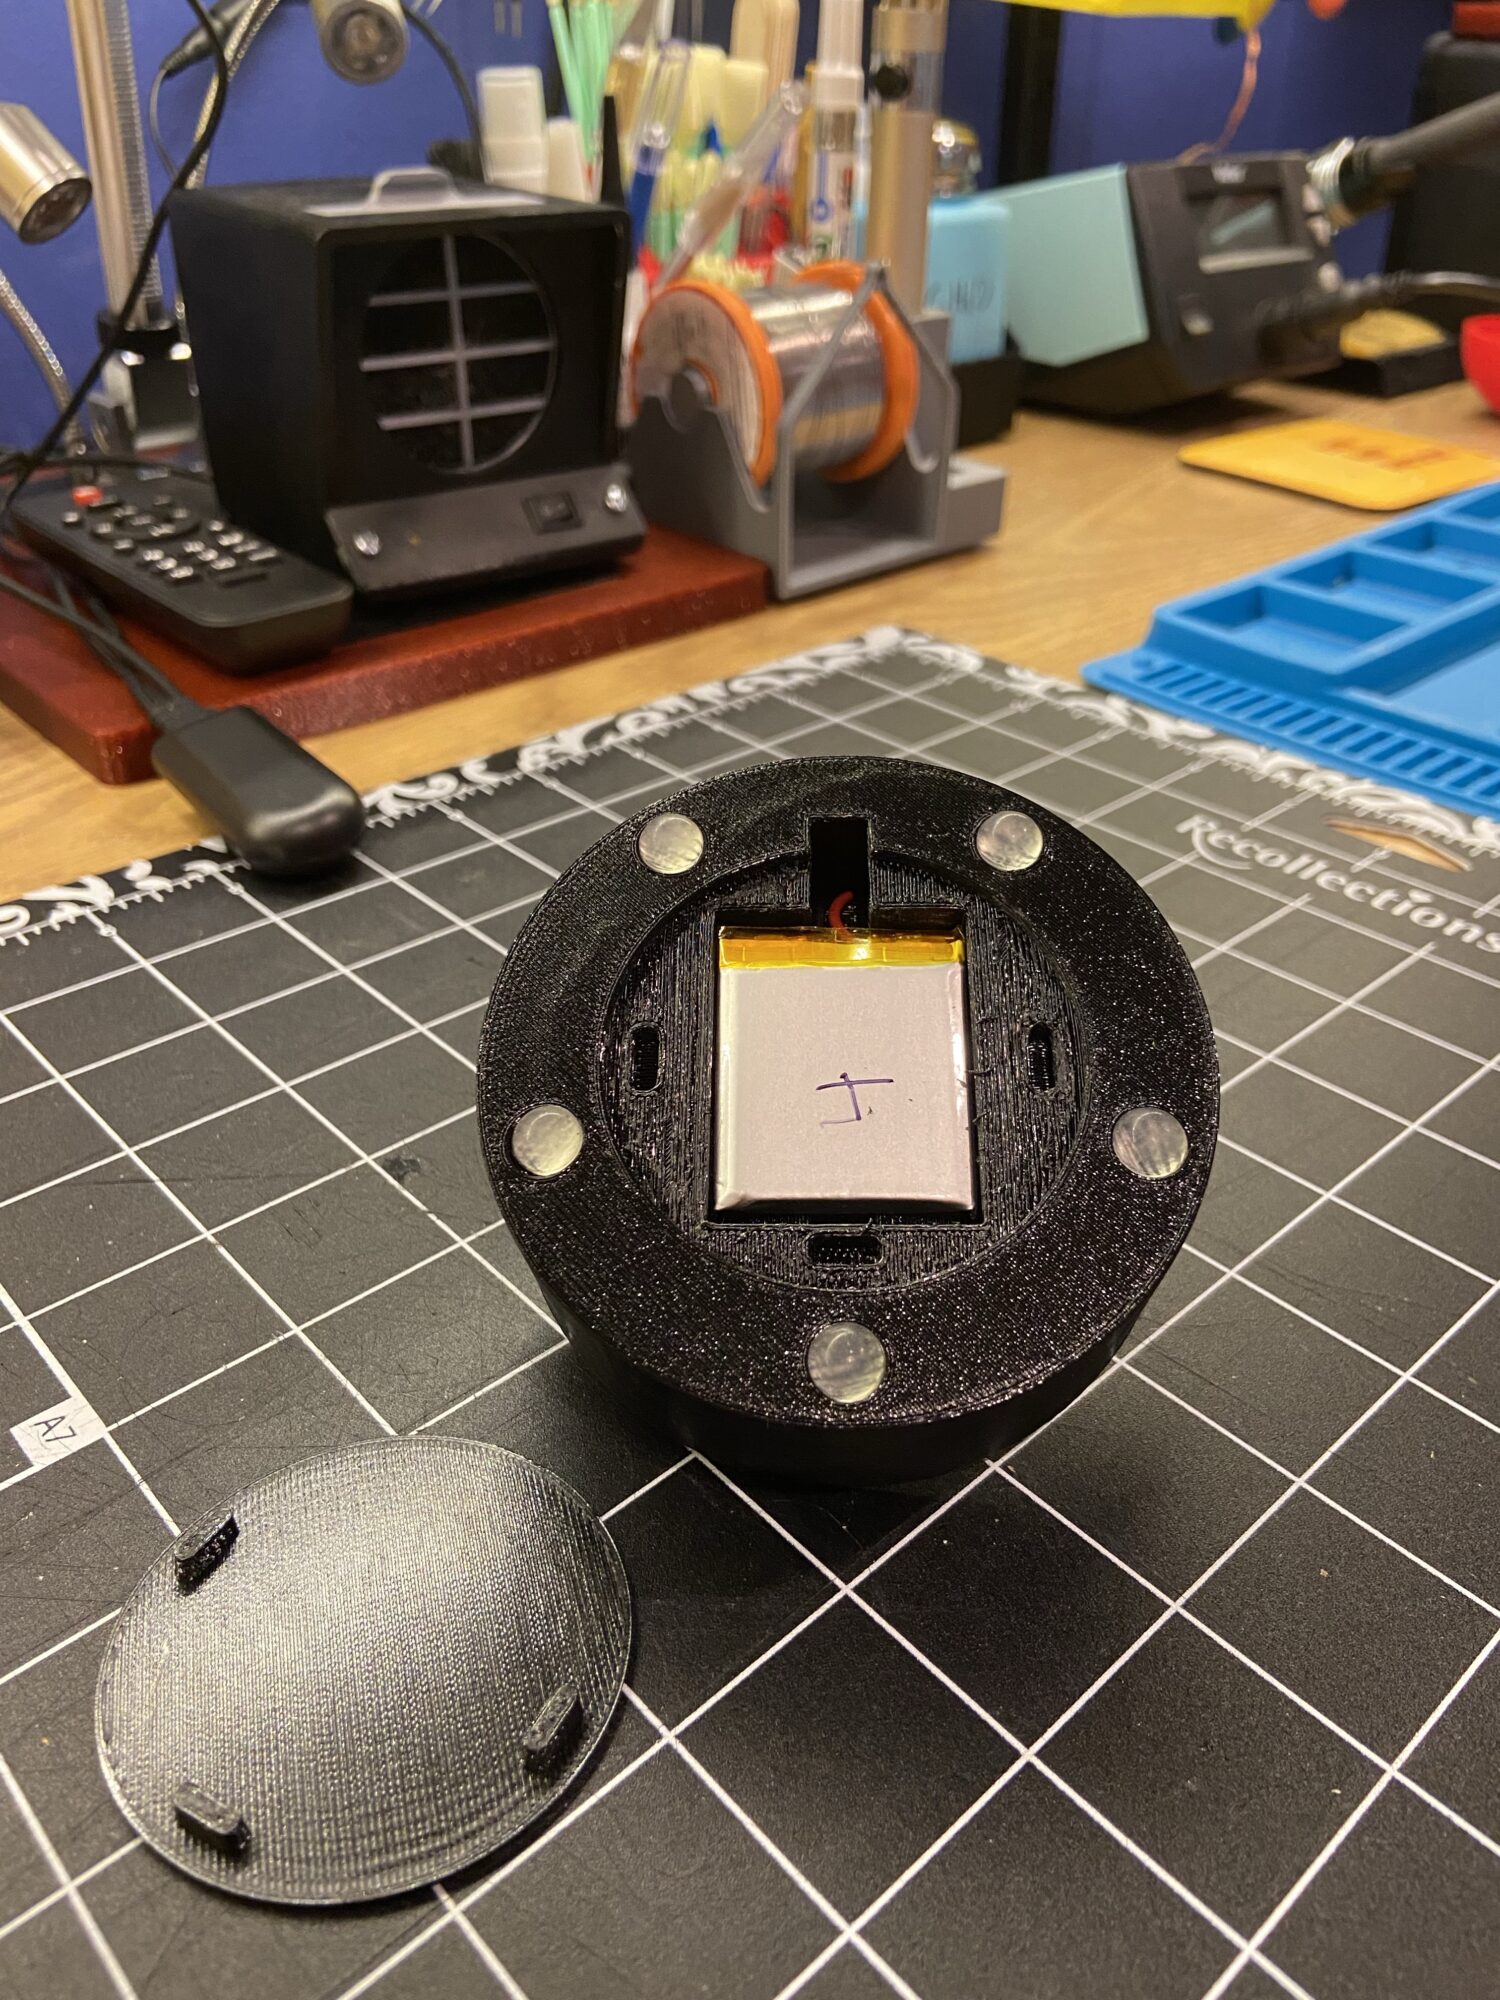
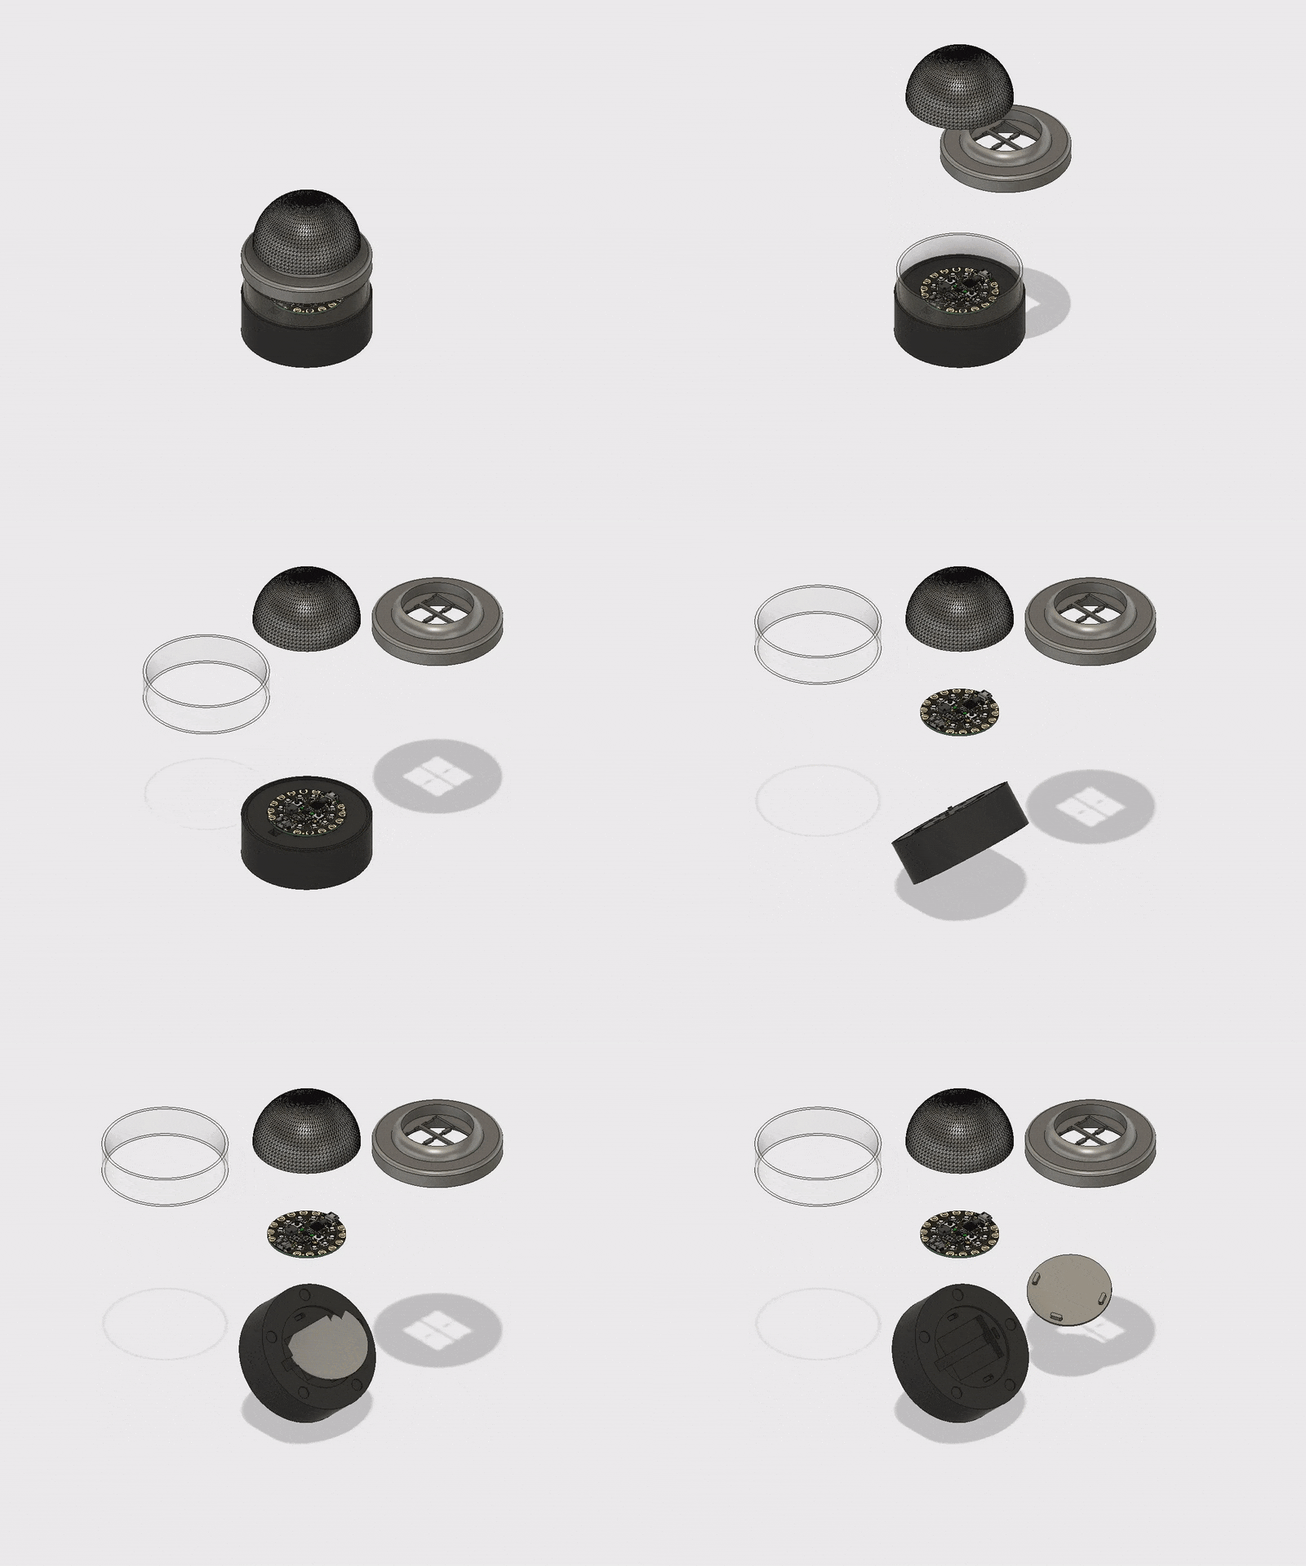
Parts List
- Code for the Bluefruit board and the PC are up on github.
- See readme for setup details
- 1 LiPo Battery Charger (the Circuit Playground Bluefruit will not charge the battery)
- For each buzzer:
- 1 Circuit Playground Bluefruit – Bluetooth Low Energy
- 1 Lithium Ion Polymer Battery 3.7V, 500 mAh
- 4 Cherry MX switches (I used these, but would recommend getting a version with more of a ka-chunk)
- 5 Adhesive rubber feet
- 3 M3 x 5mm screws and nuts
- Hookup wire for the switch
- Print one of each (3D files are on thingiverse and Prusa Printables)
- button.stl
- Knopf-4x.stl from Big Emergency / Panic Button for MySensors / pimatic (not my design)
- top.stl
- bottom.stl
- window.stl (clear filament, I used Overture Transparent Filament Clear PETG)
- battery cover.stl
Build Instructions / Notes
- First off, this is not going to win any mechanical engineering awards, but that’s what you get when let the code monkey do CAD on a time crunch. Everything is “smash fit” and as such will be somewhat sensitive to your print tolerances.
- Friction fit from the nuts hold the Adafruit board in place. Add as many as you think are necessary.
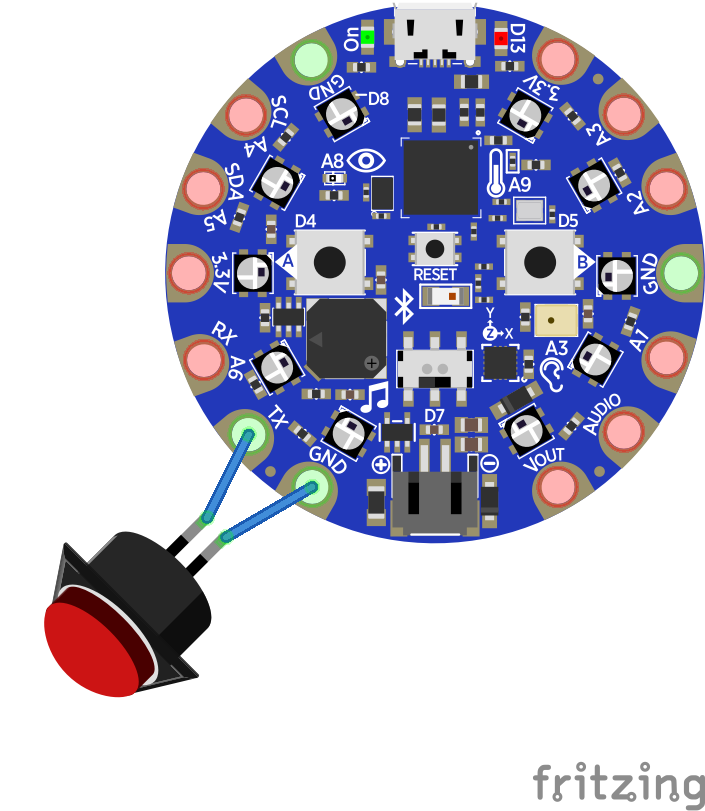
- Wiring is real simple. Only one of the key switches is actually connected (polarity doesn’t matter), the others are just for mechanical support. I opted to use screws and nuts for the connections instead of soldering in case I wanted to repurpose the Bluefruit boards at some point, but of course soldering would work too – you do you. The key switch gets wired to the TX pin and any of the GND pins:
Final Thoughts
This was a fun thing to slap together and it worked like a champ on the last cabin trip! That said, there’s plenty of room for improvement. On the mechanical side, it’d be great to move away from the whole “smash fit” concept and design in some real joints that snap or twist together.
The key switches I used have a very smooth feel, but I think something with more tactile feedback would be better. According to this, the Cherry MX Green might be the hot setup.
In theory the rechargeable battery is nice, but the fact that the Bluefruit board doesn’t have a built-in charger or a power switch means I have to take the battery out to charge it or turn it off, which is real a pain with the current design. Having a way to power it down for storage and/or switching to standard AA batteries would be more convenient.
I was only able to get this setup to work on one of my two laptops. The second one, a Surface Book, wasn’t able to connect to all four Bluefruit boards at once for some reason. I have no idea what the source of this limitation is or how common it is. A Raspberry Pi would definitely be a nice and compact form factor, but I haven’t tried it yet.
Instead of a just a silly one-off thing for The Voice, it’d be neat to expand the functionality of this to be some kind of generic trivia quiz show buzzer for the masses. My guess is the timing accuracy of the buzz-ins would have to be tighten up to make that legit, but it seems doable.
